
For existing merchants
Here you’ll find guidance and answers to the most frequently asked questions
Administrators can set up and manage the access of other account users via the Users tab in the left navigation sidebar of the merchant account. More information on user management can be found in the NETELLER Merchant Account Administration Guide.
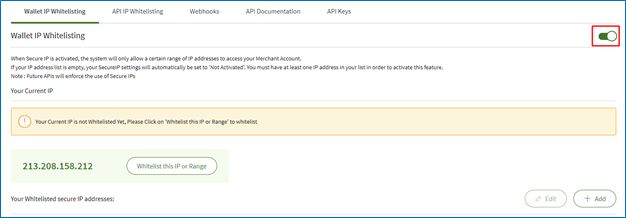
There are five tabs under Developer Settings. Navigate between Wallet IP Whitelisting and API IP Whitelisting in order to manage your IP settings for access to the wallet or the API.
To whitelist an API IP address, navigate to the Developer Settings → API IP Whitelisting tab.
Click Add and specify the IP address or the range of IP addresses and click Save. To edit an already added IP address, click Edit.
Once the IP address is added, move the toggle on the right side of “Automated Payment Interface (API)” to the right to enable the API IP restriction.
A common reason is that you are trying to access your NETELLER account from an unauthorized IP.
In such cases an Administrator (or a User with access to the tab Developer Settings) needs to access the account from an authorized IP, navigate to the Developer Settings → Wallet IP Whitelisting, specify the IP address or the range of IP addresses which you would like to whitelist and click Save.
To edit an already added IP address, click Edit. To add a new IP address, click Add.
Note: Only Public IPs can be whitelisted. If you use a dynamic IP or you would prefer not to have the IP login restriction functionality activated, a signed Indemnity Letter is required. The document is to be completed and hand-signed by a company director and a witness. It can be provided to you by the NETELLER Merchant Services Team upon request.
Your account is locked after 3 failed login attempts due to security reasons. You should contact your account Administrator(s) who can re-enable your access.
The Send money and Mass Payments functionalities can only be enabled by an Administrator.
To enable these services, navigate to Settings → Account Settings → Enable → Money Flows. The following screen appears:
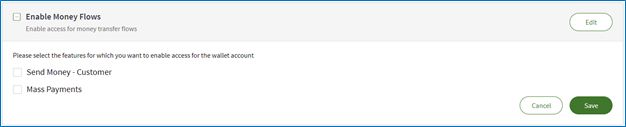
Tick the respective boxes as per your preferences and click Save.
To upload money to your wallet account, navigate to Banking in the left navigation sidebar, and click Upload Money.
- Specify the wallet in which you want to upload money.
- Specify the currency in which you wish to upload money.
- Click Apply to view bank accounts available for the corresponding wallet.
- Click [+] to expand and view the bank account details.
- Click the down arrow to download a text file of NETELLER’s bank account details.
- Instruct a payment from your bank account to NETELLER’s bank account on screen.
Note: Once you complete the process above, your wallet's actual upload of money will happen through manual bank transfer which may take 2-5 business days.
To withdraw money from your wallet account, navigate to Banking in the left navigation sidebar, and click Withdraw Money.
Specify the wallet and the currency in which you would like to withdraw money. Then specify the amount you want to withdraw into your account.
Click Next. A Withdraw review details screen appears.
Click Withdraw Money. A withdrawal success message appears.
Important Notes:
- Only bank account withdrawals are allowed. Card withdrawals are not supported.
- EEA balance can be withdrawn to an EEA bank account only.
- ROW balance can be withdrawn to ROW bank account only.
- If you wish to withdraw funds from an EEA balance to a ROW bank account, you need to first exchange the funds from your EEA balance to your ROW balance. Vice versa is applicable as well. If the exchange takes place between different currencies, a FX fee applies.
The following 2 options are available to you:
- To download a balance statement manually from the Merchant Portal;
- To schedule a recurring balance statement delivery.
To view your balances and download your statements manually, navigate to Balances in the left navigation sidebar and click Balance Statements. To view balances for a selected period, specify the From and To dates. Click Download to download a PDF copy of your balance statement details.
To schedule a report, click Schedule a New Report. Specify the wallet account and the currency which you need your report for and set the frequency of reports (Daily, Weekly, etc.) in the format (PDF, CSV) that suits best your needs and click Save.
A transaction appears as scheduled in the following scenarios:
- If you send money to an e-mail address which is not registered in our system;
- If you send money to an e-mail address that is no longer active in the respective user’s NETELER account.
The recipient will have 14 days to register an account with the email address or to add it to an existing NETELLER account. Afterwards the transaction will be canceled, and you should initiate it again.
In order to find the most up-to-date contact details of the NETELLER Merchant Services Team, login to your account and navigate to the Merchant Information tab in the left navigation sidebar.
You can view all merchant-related information in one place along with the NETELLER Merchant Services Team contact information. Please make sure to provide your Merchant ID when contacting us.